Tuesday, April 15, 2014

Tri polish Tuesdays- gelicious strawberry gelato gel polish


Hello everyone! Todays another Tri polish tuesday and I thought i'd go the gel option with this mani!
I used the beautiful Gelicious Strawberry gelato. This is a 30 sec LED gel polish which is a super bright hot neon pink. and it is also UV reactive...which means it GLOWS!!!!! in UV or blacklight, so an added bonus!
I found I needed 3 coats for full opacity,I did not use a base coat but I did use a gelicious top coat.
Check out the colour......


Sun

Shade
Pretty right??!!
 Ok so Tri polish tuesday... I cheated a little and decided to use nail studs for the yellow and blue. I popped another coat of Gelicious top coat on my nails then added the studs. then cured, this stuck the studs fast so they did not fall off.


And how cool is that not only the Gel polish glows but the nail studs do too!!!!!!

If you would like to grab a bottle of Gelicious Strawberry gelato check out Gelicious HERE. Gelicious are always having great offers and at the moment they have buy 3 get the 4th free. their prices start from $29.00, and I have to say the gel is well worth the money.
The nail studs i purchased from ebay.


Make sure you check out everyone else's manis for this tuesday below.

Until next time.........
post signature


* all polish was provided for me to review. please check my disclosure policy for more information.

Monday, April 14, 2014

AN Monday- easter with Orly smartgels


Hi there everyone!!! how are you all?? its getting close to easter and this week AN Monday has chosen the theme EASTER!! 
I decided to share with you some Easter nail at using a very pretty yellow gel polish from Orly.
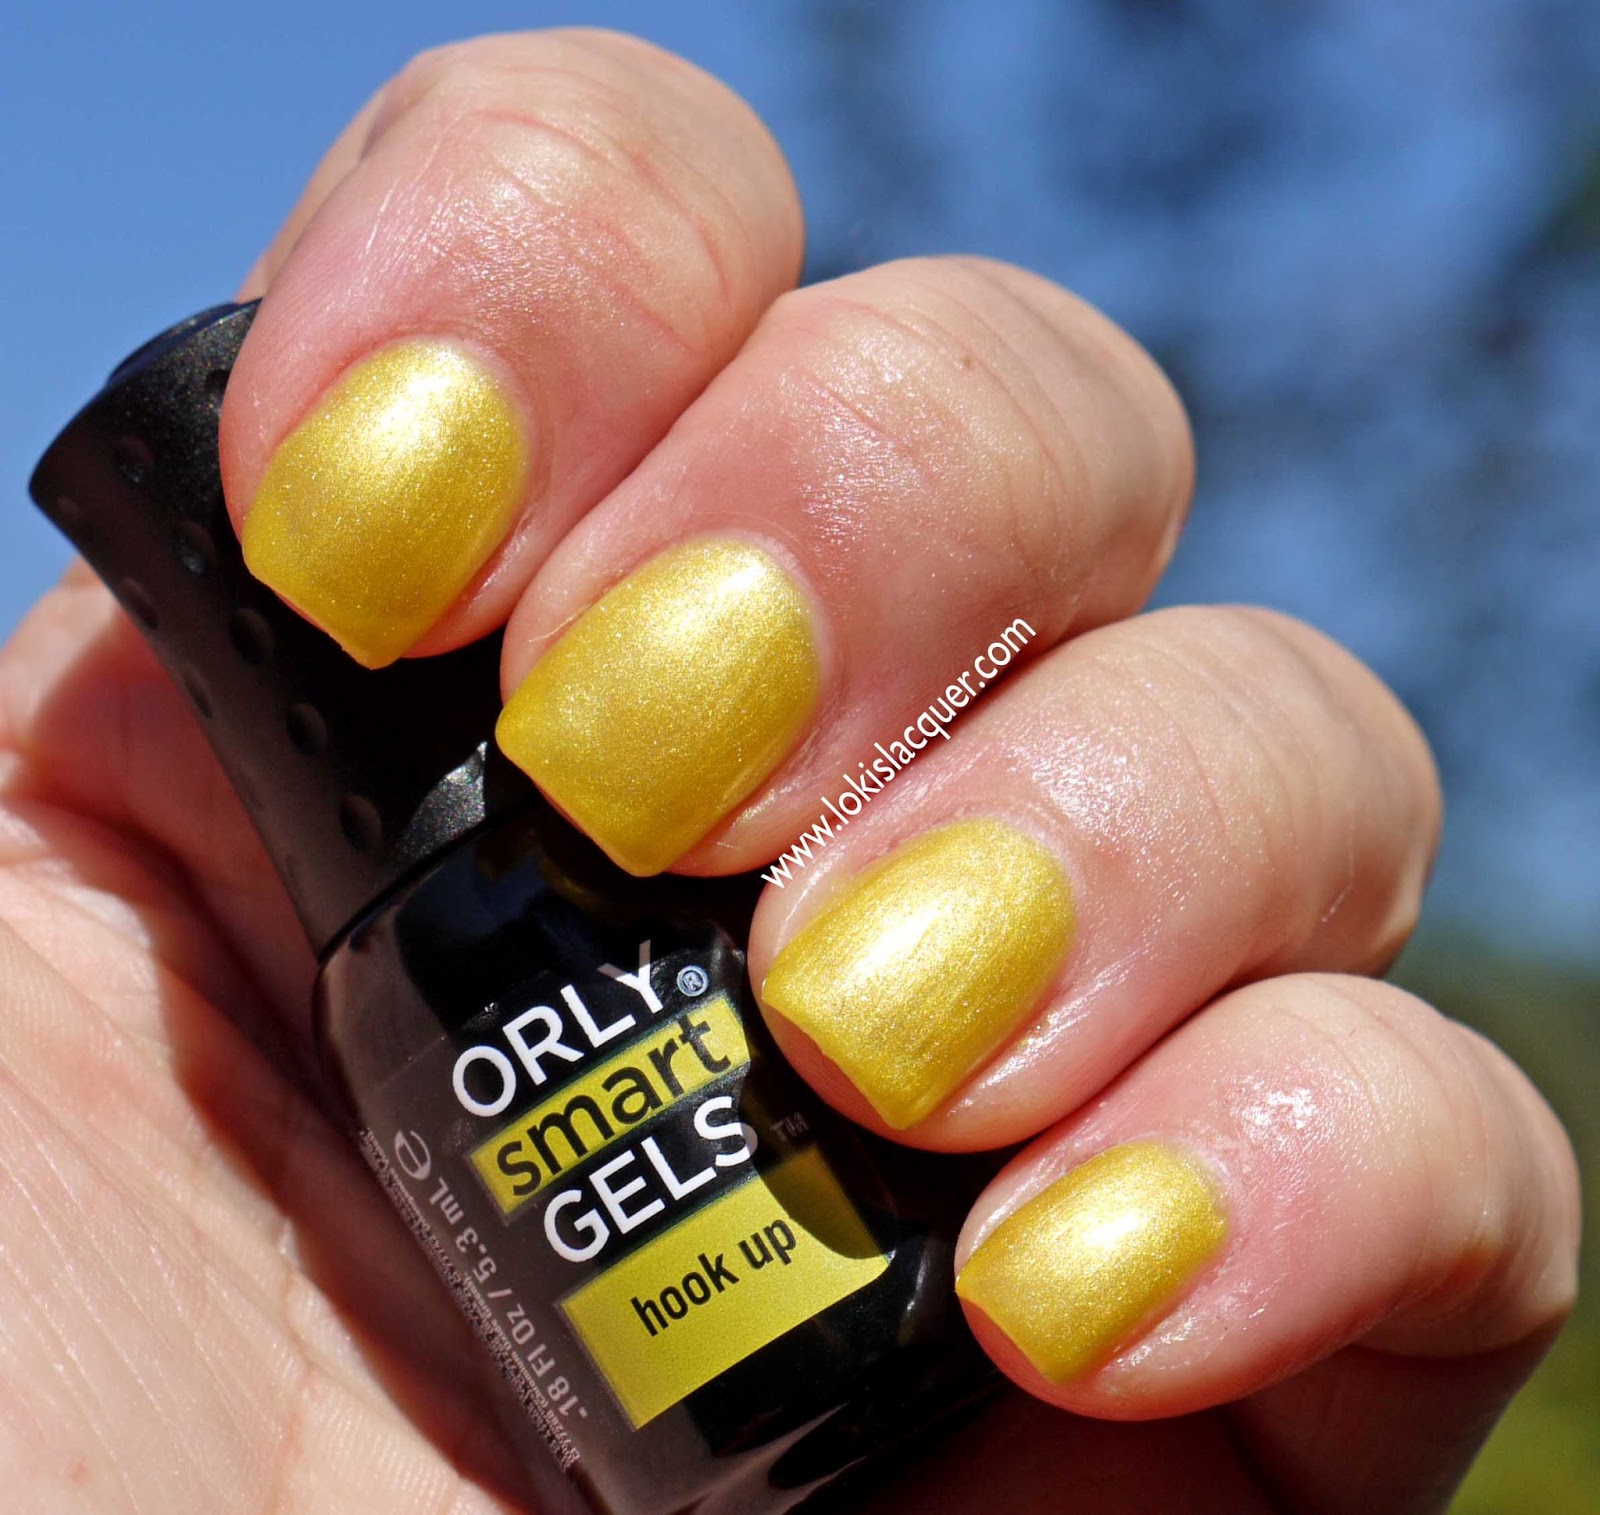
I took Orly smartgel in the colour Hook up! and painted and cured my nails. I used 3 coats to get opaque then finished with a top coat of vivigel. I then wiped off the sticky residue.


sun

shade

Such a pretty colour right??!! Especially for Easter! Then I took Ulta3 bright me, black satin and lily white and hand painted the little chicks and their shells. I waited a good few hours to make sure my polish was completely dry,then I layered over another top coat of vivigel. This way my manicure is protected for the length of the gels on your nails.

sun

shade

This yellow Orly Smartgel was the perfect colour for my chickies!!!

You can pick up Orly Smartgels from your local chemists or you can check out their stockists page HERE to find your local salon or shop that stock Orly.

You can also pick up your favorite Ulta3 polishes at your chemist or online at THE HEAT GROUP.

Until next time...... 
post signature
* the gel polish was given to me for review. for more information please check out my disclosure policy.

Sunday, April 13, 2014

Aliquid's bloggiversary giveaway!!!


Hi there everyone!!!! im here today to share with you a bloggiversary giveaway I am involved with!!
This month is ALIQUID'S birthday and what better way to celebrate than to give some goodies away!!!!! I am lucky enough to be involved with this little giveaway and put up for grabs 2 bottles of Loki's Lacquer.Yep ! and you can pick any colour of your choice from my past collections!!! (LE not included of course). Now that Loki's Lacquer has shut its doors this is a great opportunity to grab 2 bottles of polish that is no longer available!!!!!

You can check out Aliquid's blog bloggiversary HERE. alternative the rafflecopter is below for you to enter as well!!! some prizes are international, some are australia only and some are USA only, so enter to get your chance to win!!!!! Also while you are at is make sure you check out Aliquids etsy shop too!!!!you can find her HERE.  


a Rafflecopter giveaway


The giveaway finishes on the 21st April so enter now!!!!!!


Until next time..........
post signature

Saturday, April 12, 2014

Sally Hansen Gel manicure Starter kit Tutorial.


Hi there everyone! I have to day to share with you the Sally Hansen Salon Gel Manicure Starter Kit. As far as I am aware this kit is exclusive to Priceline. 
The kit is a very straight forward process for someone who has not used Gel before and when done correctly you can get a good 2 weeks wear from a single manicure, so for work, or holidays this "gel at home" kit is well worth the money.


The kit comes in a little box with everything you need to start your gel journey.  When you are at the shops you can check out what the kit looks like as Sally Hansen have cleverly put a little flap on the box so you can see exactly what you are getting. I love that you can see this as most gel kits you cant see what you are getting till you get home. 


So what is in the kit?? When you buy the Sally hansen salon gel manicure kit you will receive the following.
  1. A LED lamp.
  2. Sally Hansen gel base coat
  3. Sally hansen gel top coat
  4. Sally hansen coloured gel- the kit I got had Wine not as the colour,but there are several choices.
  5. Orange stick- to push your cuticles
  6. Buffer
  7. acetone
  8. lint free wipes with a cleanser in them to clean off the sticky residue from the gels.


So how do you use this kit? I have popped together some basic instructions to help you get the best manicure possible with the Sally Hansen Gel kit. I hope this helps everyone get a good idea on how to use the kit and for those who have been a little wary about gel kits this little tutorial will help you see the process is very simple and easy to do.

When doing any gel manicure I always recommend you complete one hand first before starting the second hand. This will stop and smudges.

Step 1-  Take the orange stick and push back your cuticles. This is a good practice to do regularly but when applying gels you do not want cuticles getting in the way of applying your gel polish.
With the orange stick use the diagonal end (not the pointy end) and carefully push back the cuticle on each nail as seen below.


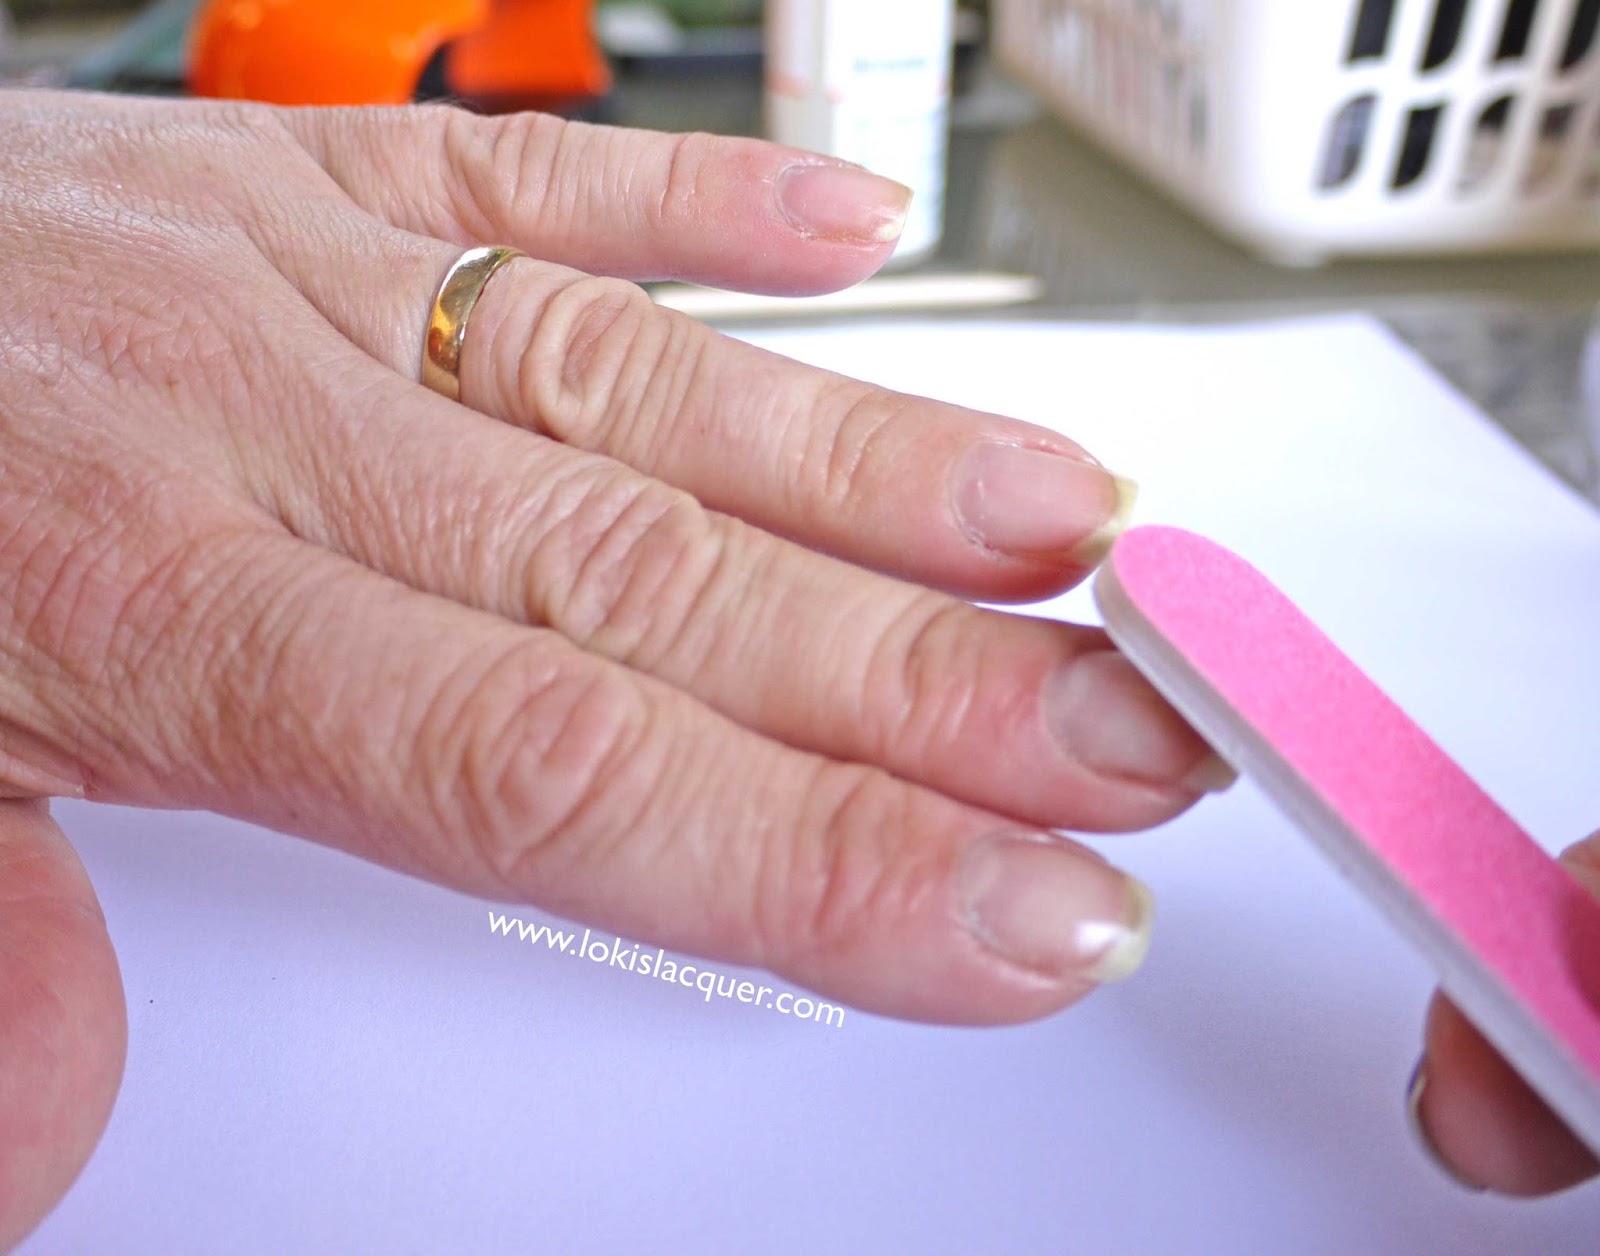
Step 2- Take the buffer and using the side that is grey ( not the pink side) and lightly buff your nails.


Step 3- Once you have buffed take a wipe (preferably lint free) and wipe your nails down with the Sally Hansen Acetone. 


Step 4- Now your nails are prepped, you can start the gel manicure.  
Take the Sally Hansen base coat, which is labeled step 1 on the bottle, and carefully paint a thin layer on your nails. When painting the gel on your nails DO NOT go all the way to the cuticle. leave a gap at least 2 mm. you do not want to flood your cuticles. This will make for a painful experience once cured. The other reason is with Gel manicures you need to create a "seal" so by leaving a gap, when you get to the top coat you can go slightly over the base and colour and "seal" them both in with the top coat.


 Step 5- Place your 4 fingers under the Sally Hansen Salon manicure LED lamp and press the button. this is a timed lamp and will turn on for 30 secs which is the correct time to cure the Sally Hansen Salon Gel polish range. Once you have cured your 4 fingers, do the same to your thumb. Please....do not try to squeeze your thumb in with your 4 fingers. It is only 30 secs, getting your nails cured correctly will make the world of difference with the end result, so remember 4 fingers...then thumb.


Step 6- Once you have cured your nails now is the time to use the colour. The kit I have came with a colour called Wine not, so I will be using this colour, but Sally Hansen Salon Gel polish comes in a variety of colours that you can purchase separately. 
Paint a thin layer of colour on your nails. Please make sure you do thin layers. with Gel polish ,more is not good. Gel polish likes to settle. It is a cured product and if you over paint your nails too thick, the polish will not cure in the 30 secs under the lamp. It can sometimes be hard to get out of the habit of painting that little bit thicker like you do with regular polish, but with Gel polish it needs to be kept thin. Curing is only 30 secs so it is quick and easy to build up the colour with thin coats to get a perfect finish. 
When you paint the colour again, make sure you leave a 2 mm gap from your cuticles. we don't want flooded cuticles do we :)


Step 7- Once you have painted your nails with the coloured gel, cure your nails for 30 secs. (one press of the button) 4 fingers first, then the thumb separate.
Repeat step 6 and 7 until you get the desired thickness of Gel polish. For the colour I am using I only needed 2 coats to reach opacity.


Step 8- Once you have cured the coloured gel polish, and have the desired layers of colour, it is time for the top coat. The top coat bottle is labeled step 3, so it is easy to find in your kit. Again make sure you use a thin layer of the top coat and this time only leave a gap of 1mm from the cuticle. so basically you are sealing the colour in. also take your gel polish brush and carefully go over the tips of your nails. By painting a thin layer of gel over the ends/or tips of your nails you are totally sealing the polish in with the top coat, this helps stop chipping and gives your manicure a little more durablilty. 


Step 9- Cure your top coat for 30 secs (one press of the button) 4 fingers first and the thumb separate.


Step 10- Take the wipes that are provided in the kit and wipe each nail to remove any sticky residue that is a by product of your gel manicure.


Step 11- Finally once you have wiped your nails, repeat steps 1-10 on your other hand. Then wash both hands in warm soapy water. I always do this to make sure all the residue is off my nails. I then put a little cuticle balm on my nails to moisturize. I have found that Sally Hansen Cuticle Massage cream is really moisturising.


The final result?? Wine not is a beautiful deep reddy colour with a slight shimmer. It took 2 coats for opacity. You can purchase this colour with the Gel kit or by itself.

In sun

In shade
I hope I have explained to you the basics of the Sally Hansen Salon Gel manicure kit If you have any questions please feel free to leave a message in the comments section and I will reply to you there :)

The kit is Exclusive at Priceline. You can grab it in store or online HERE. They retail for $99.95 but at the moment they are on special for $89.95. you can also pick up the gel polish separate in Priceline HERE each colour retails for $19.95 each. Priceline also stocks replacement cleanser pads for $11.00 and the acetone for $9.95.

Until next time.......
post signature

*This kit was provided to me for review. for more information please check out my disclosure policy.

Friday, April 11, 2014

Fuse Gelnamel Swatches Part 1


Hi there everyone!
Today I have to share a new brand to australia called Fuse Gelnamel. This is quite a kooky idea of a hybrid gel that has a base coat, the colour gel and the top coat all in one formula. Suspicious??? me too at first. but after giving it a go I have found the idea is great for people who are short of time and want gel nails NOW!!! Especially if you have kids! this is a quick way to get those pinkies coloured quick smart and then you can carry on with the kiddies.
All the Gelnamel colours cure under LED lamps in 30 seconds. You can purchase a starter kit for $49.95 at a variety of department stores and chemists like Priceline. The kit contains one colour, lint free wipes a little bottle of a special cleanser (its basically isopropyl alcohol, tho I do like the little bottle as it fits in my nail box) a buffer file, cuticle stick and the LED lamp. I will be doing a post on the lamp later on and how it works, but for now let me tell you its cute, you do one finger at a time and you can plug it into a USB port so great to travel with!!!

Ok so lets get on with the 3 colours I have to share today.


* All these swatches were done step by step as per instruction on the Fuse instruction leaflet. so no top or base coat was used.

Such a Laser-  This gelnamel is a gold metallic colour. I was expecting a micro glitter from the look of the bottle but was pleasantly surprised to find a lovely gold metallic. I do not have one like this in my gel collection so was quite excited! It 2 coats to get opaque and no VNL. I noticed when I used the cleanser to remove the sticky residue at the end of the curing process a small amount of colour came off and the polishes looked a little dull, but after washing my hands with soapy water (which is what I do whenever I use gel polish) the shine came back. I was very impressed with this colour.

In Sun

In shade

Sonic Blue-m - A bright almost neon blue. I totally adore this colour. It is "in your face"and I cannot wait to use it lots of nail art. The formula went on a little streaky with the first coat, but improved after the second. I think the main reason was due to the tiny brush that came with it. I have noticed that some colours have longer brushes than others. I contacted Fuse, and they have assured me that the new batch of gels will all have the longer brushes, which is awesome. The small brush was manageable so stick with it, the colour is worth it!!!!
I did 3 coats here and you can see a little VNL but I think with a longer brush i would not have seen this VNL. 

In sun

In shade

Intens-so fly- OMG!!!! I totally needed a good green that does not take a million coats and I have found it!!! I am totally loving this green!!!!! It was 2 coats and what can I say! I am just happy I now have this colour in my stash! The formula was great and went on perfect. Love! Love! LOVE!!!!!

In sun

In shade
So there you have it. The first 3 shades of Fuse Gelnamel. I will be swatching more of the shades over the coming weeks. so make sure you subscribe to my blog so you do not miss out on a single swatch!

You can purchase Fuse Gelnamel HERE. Or if you would like to go to a shop check out PRICELINE as they currently have 25% off until 16th April 2014.

Until next time.......
post signature

* Products were given to me for review. For more information please check out my disclosure policy.